We all know how important it is to have invoices with correct data. Accurate invoicing not only helps maintain professional relationships but also ensures compliance with tax regulations. This guide will help you find out where to input all the necessary information for your invoices and how to specify the email for receiving notifications regarding your payments, including invoices, receipts, alerts about upcoming payments, and account expiry dates.
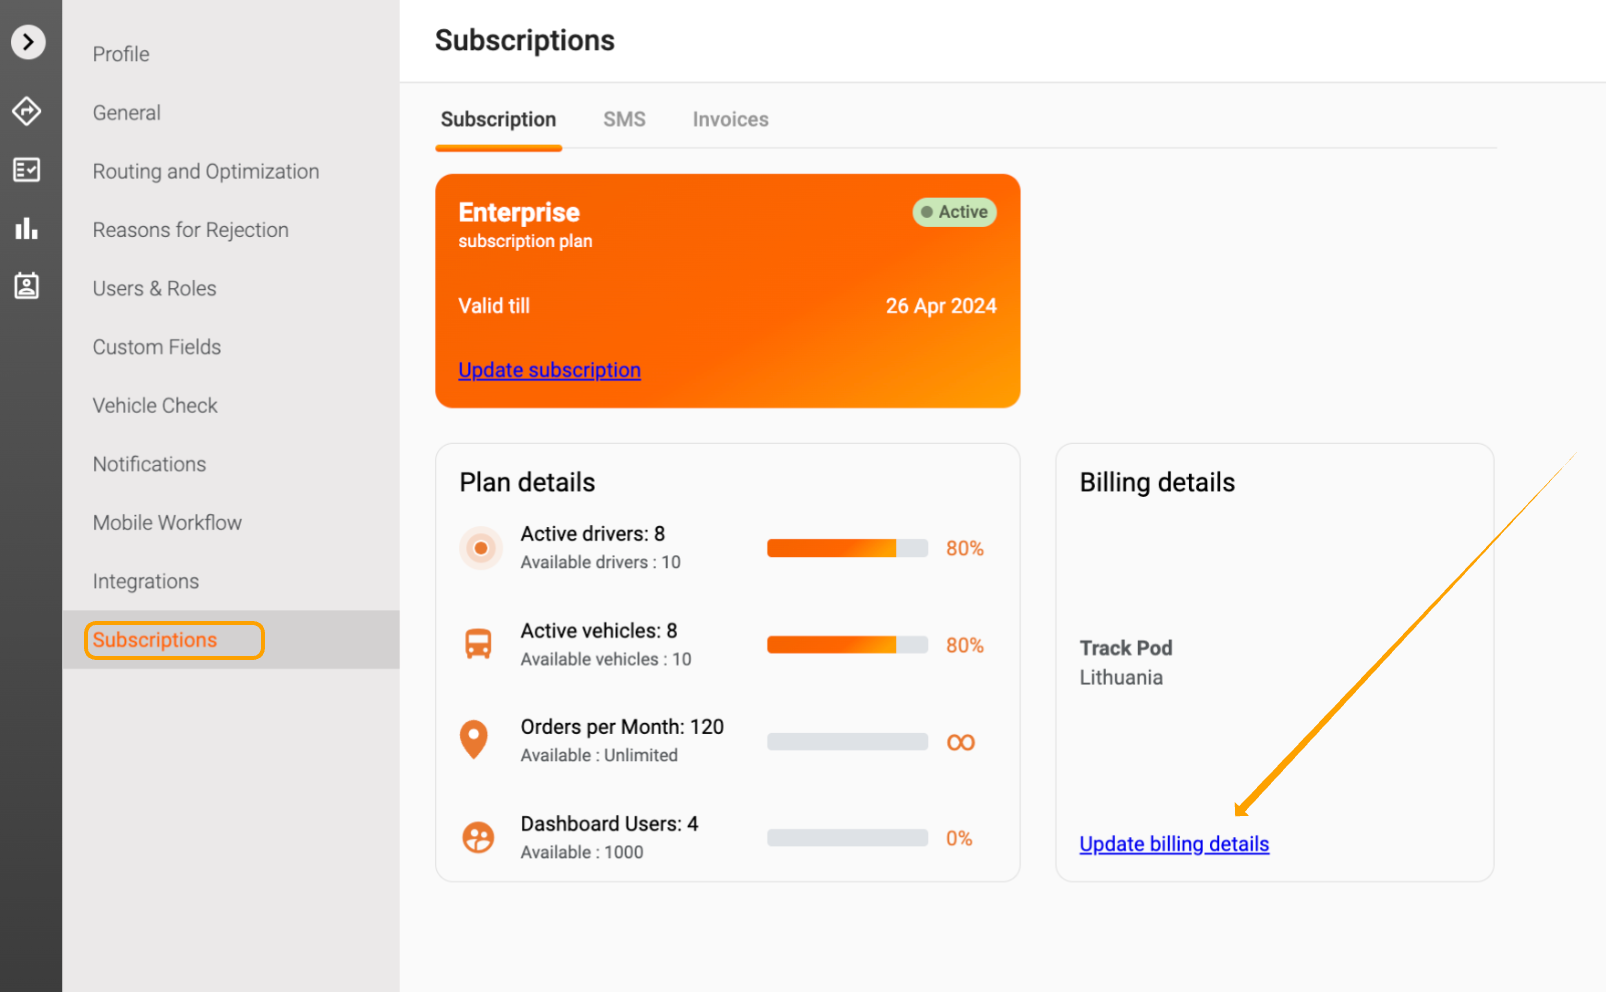
Step 1: Access Subscription Settings
To update your invoicing details, start by navigating to Settings in your account. From there, click on Subscription and select Update Billing Details. This section allows you to manage all the essential information that appears on your invoices.
Step 2: Enter or Update Company Information
In the billing details window, you can enter or update the following company information to ensure you receive accurate invoices:
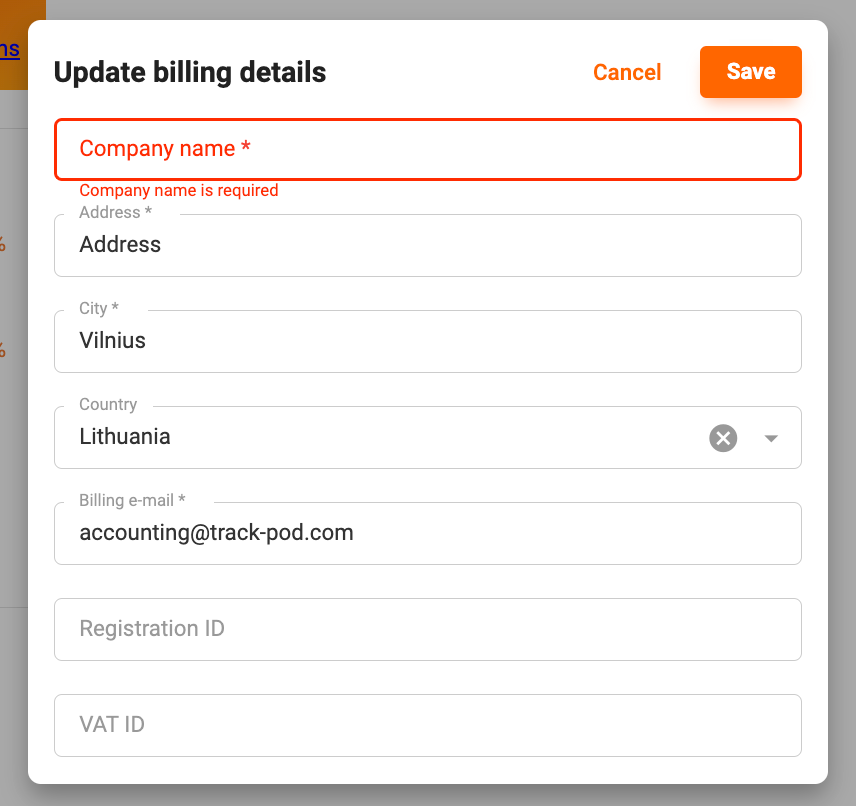
- Company Name: Make sure to enter your official business name as it should appear on the invoice.
- Company Address: Provide the complete address of your business, including street, city, state, and postal code.
- Registration ID: This is your unique business registration number. Ensure it is accurate to avoid any legal issues.
- VAT ID: If applicable, enter your VAT identification number to comply with tax regulations.
Please note that once an invoice is generated, it cannot be reissued with updated information. Therefore, it’s crucial to double-check all entries before saving.
Step 3: Specify the Billing Email
In the same window, you can also specify a Billing Email. This could be an email address for your accounting department or a dedicated email for collecting invoices. All invoices, receipts, and notifications regarding subscription renewals and upcoming payment dates will be sent to this email address. This ensures that your team stays informed and can manage payments efficiently.
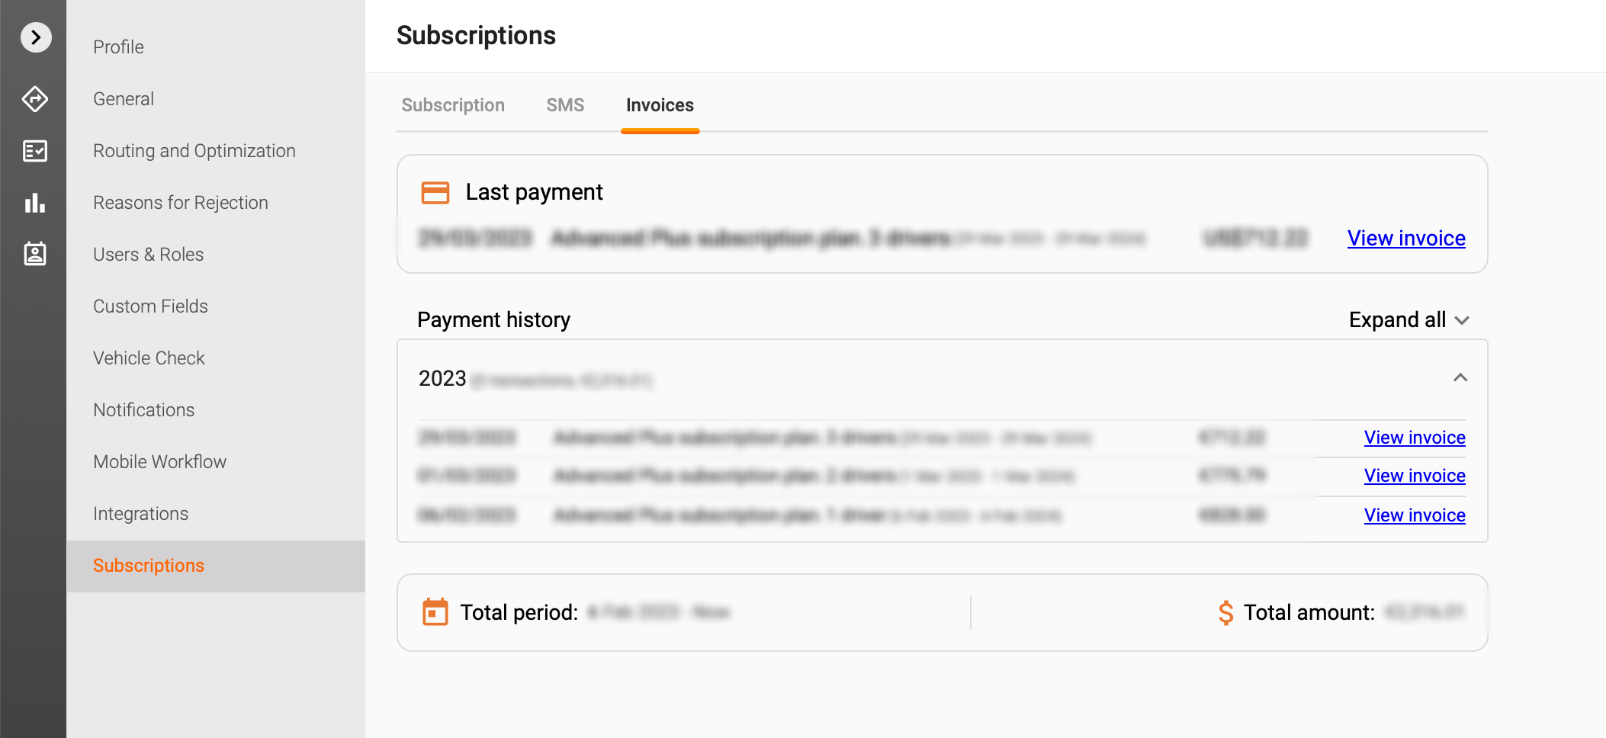
Step 4: Accessing Invoices and Payment History
You can easily access settled invoices and your payment history in the Invoices tab of your account. This feature allows you to keep track of all your financial transactions and ensures you have a clear record for your accounting needs.
That’s it! We trust that this app will bring a lot of value to your business by simplifying your invoicing process and keeping your financial records organized. If you have any further questions or need assistance, feel free to reach out to our support team!
Was this article helpful?
That’s Great!
Thank you for your feedback
Sorry! We couldn't be helpful
Thank you for your feedback
Feedback sent
We appreciate your effort and will try to fix the article